192.168.0.1 is the default Internet Protocol (IP) address that is used by many routers like D-Link, TP-Link and Netgear.
It acts as the bridge between the router/modem and the system to which it is connected to. These IP addresses are necessary to access the admin login panel – http://192.168.0.1.
You can connect your routers to a network or even a modem to access 192.168.0.1. Just be sure that there are no other interfering VPNs or proxies set.
Having a different DNS’ should not matter, as 192.168.0.1 is strictly linked to your router. In other cases, VPNs interfere with the default gateway, so logging into the router’s settings panel can be difficult.
Kindly note that your modem/router may also have the default gateway in the format 192.168.X.1.
Admin panels are responsible for everything (as the name already suggests) that takes place with the help of a router or modem.
You can do everything from the admin login page to setting up SSID and even the WiFi password. However, you need to be really cautious while changing your router’s settings, as it can even cause it to malfunction.
How to log in to 192.168.0.1?
Kindly note that you should do the steps on a system connected to the router/modem wirelessly or directly.
To log in to 192.168.0.1, you need to follow these simple steps:
- Open the web browser of your choice (we prefer Chrome, Safari, Firefox, and Edge).
- Type 192.168.0.1 or http://192.168.0.1 inside the address bar and hit enter.
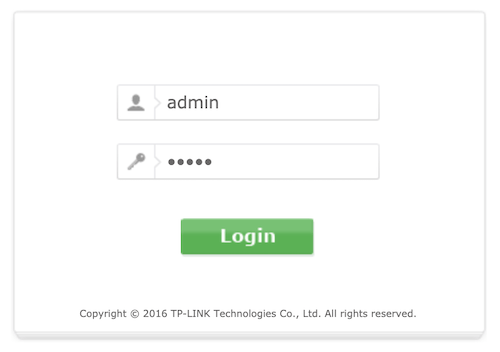
- You will get a login page (or a popup).

- You will be asked to enter an admin username and a password.
- You can use the system defaults since you are opening this page for the first time. Enter admin as the username and admin as the password.
- Hit enter.
- You have successfully logged into the router’s admin console.
If the credentials do not work, turn your router upside down to see the default credentials.
Please Note: Never use https or www along with 192.168.0.1, and only use http (or nothing). IP addresses do not contain alphanumeric characters and only numbers that are separated by a dot. Eg. 111.111.111.111.
How can the 192.168.0.1 router’s admin password, WiFi password, and SSID be changed?

Now, since you can successfully access the admin panel, making changes to your router will become easy. Here are the steps some other things that you can do after accessing 192.168.0.1:
Change 192.168.0.1 Admin Login Password:
- Login to 192.168.0.1.
- Go to Maintenance & Settings.
- Go to Username & Password.
- Enter the username of your choice and enter the current password, followed by the new password.
- Hit enter.
- Done.
Change 192.168.0.1 WiFi Password & Username:
- Login to 192.168.0.1 by entering the admin console username and password.
- Navigate to WLAN or Wireless LAN (WiFi) settings.
- From over there you will get to see the SSID option.
- SSID is the WiFi name, and your router may have two different SSIDs for the 2.4 GHz and 5.0 GHz networks.
- Rename it to the SSID of your choice and click on save.
- The router will restart (it will take around 10-15 seconds to fully restart), and the SSIDs will change.
To change the WiFi password:
- Ensure your WiFi connection has WPA/WPA2 enabled inside the WLAN settings instead of Open.
- Enter your desired password inside the password/pre-shared key field (can be an alphanumeric key that contains special characters).
- When you click on save, the router will restart. Wait for the router to reboot, and you’re good to go.
What to do in case you mess up?
No need to worry in case you screw up some settings. There is always the good old reset button hidden inside your router. Insert a sharp pointy pin or needle inside the reset hole while your router is turned on and hold it for 10-15 seconds. Once the router reboots and the lights flicker, let go of the needle, and your router will be reset.
